















































Julia’s Print Clinic
Cutlines & Drill Holes: How to Set Up Print-Ready Artwork
Practical artwork advice from Graphic Warehouse to help trade printers, sign makers, design agencies, print brokers and copy shops supply files that are ready for production.
In this guide, Julia explains how to set up cutlines and drill holes correctly for large format print, shaped boards, stickers, contour-cut graphics and rigid signage.
Meet Julia
Your Artwork Advice Expert
Julia is part of the Graphic Warehouse Customer Service team and helps customers prepare artwork for production every day.
“Most artwork problems are easy to avoid once you know what our production team needs.”
In Julia’s Print Clinic, she shares practical tips to help trade printers, sign makers, copy shops and designers get artwork right first time.
In Julia’s Clinic Today
Cutlines & Drill Holes
Cutlines tell our finishing equipment where your printed product should be cut. Drill hole cutlines tell us where fixing holes should be placed.
When You Don’t Need a Cutline
If your product is a standard square or rectangle, such as many posters, banners or rigid boards, you usually do not need to supply a cutline.
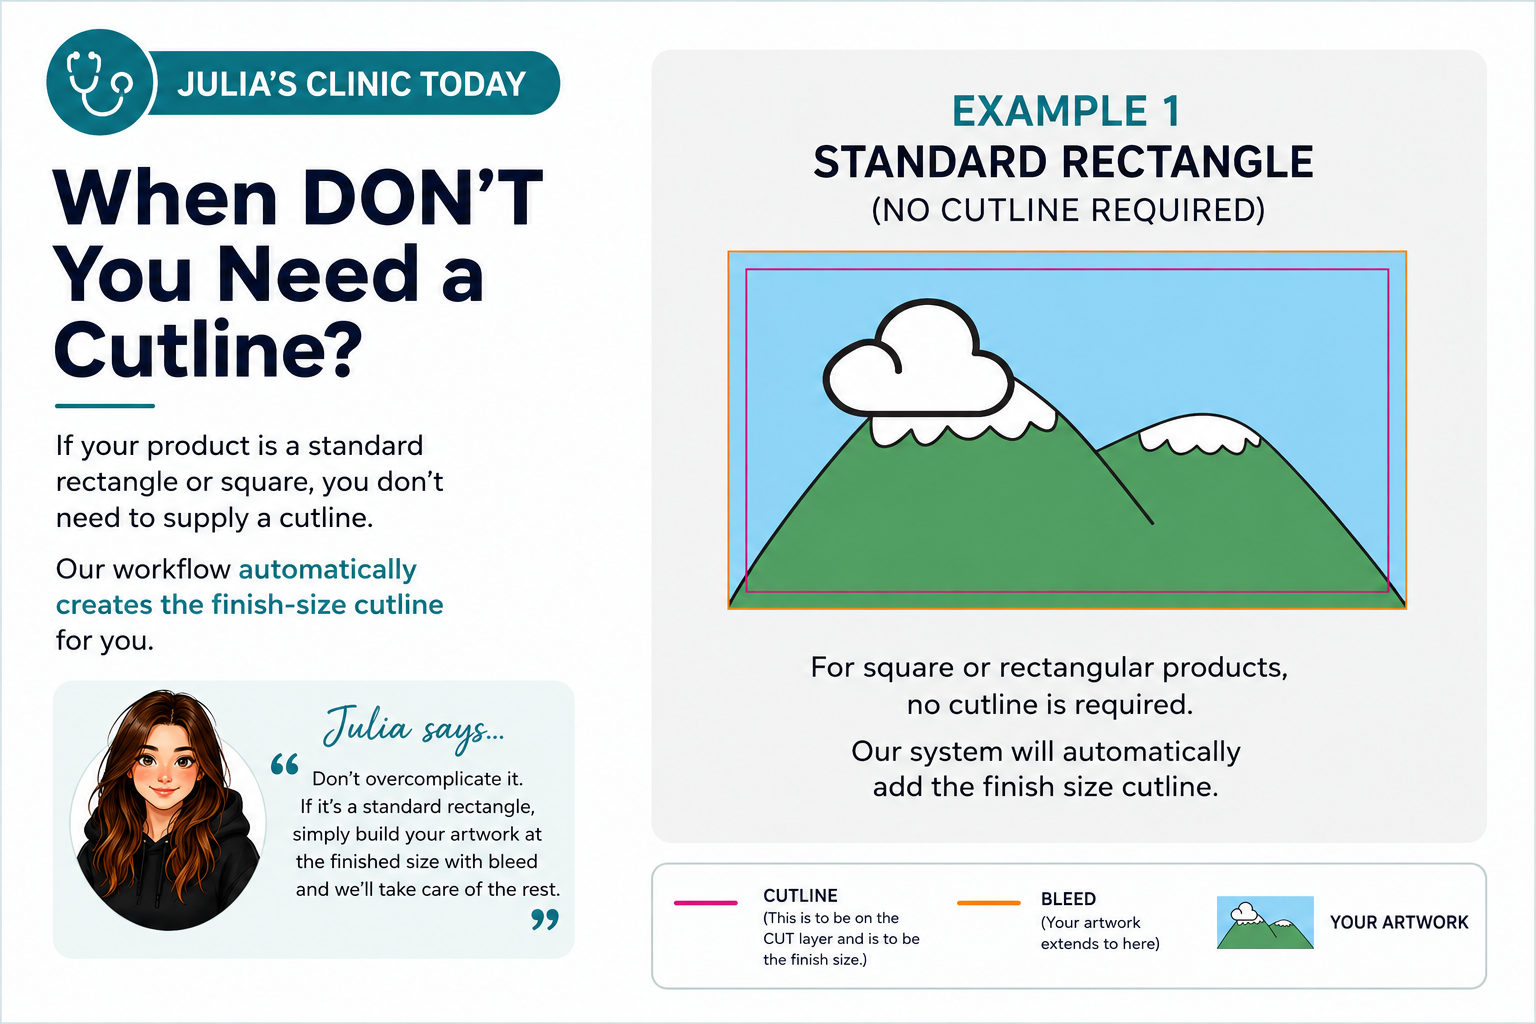
Our workflow automatically creates the finished-size cutline for standard rectangular products.
When You Do Need a Cutline
If your product is cut to shape, you need to supply one continuous vector cutline.
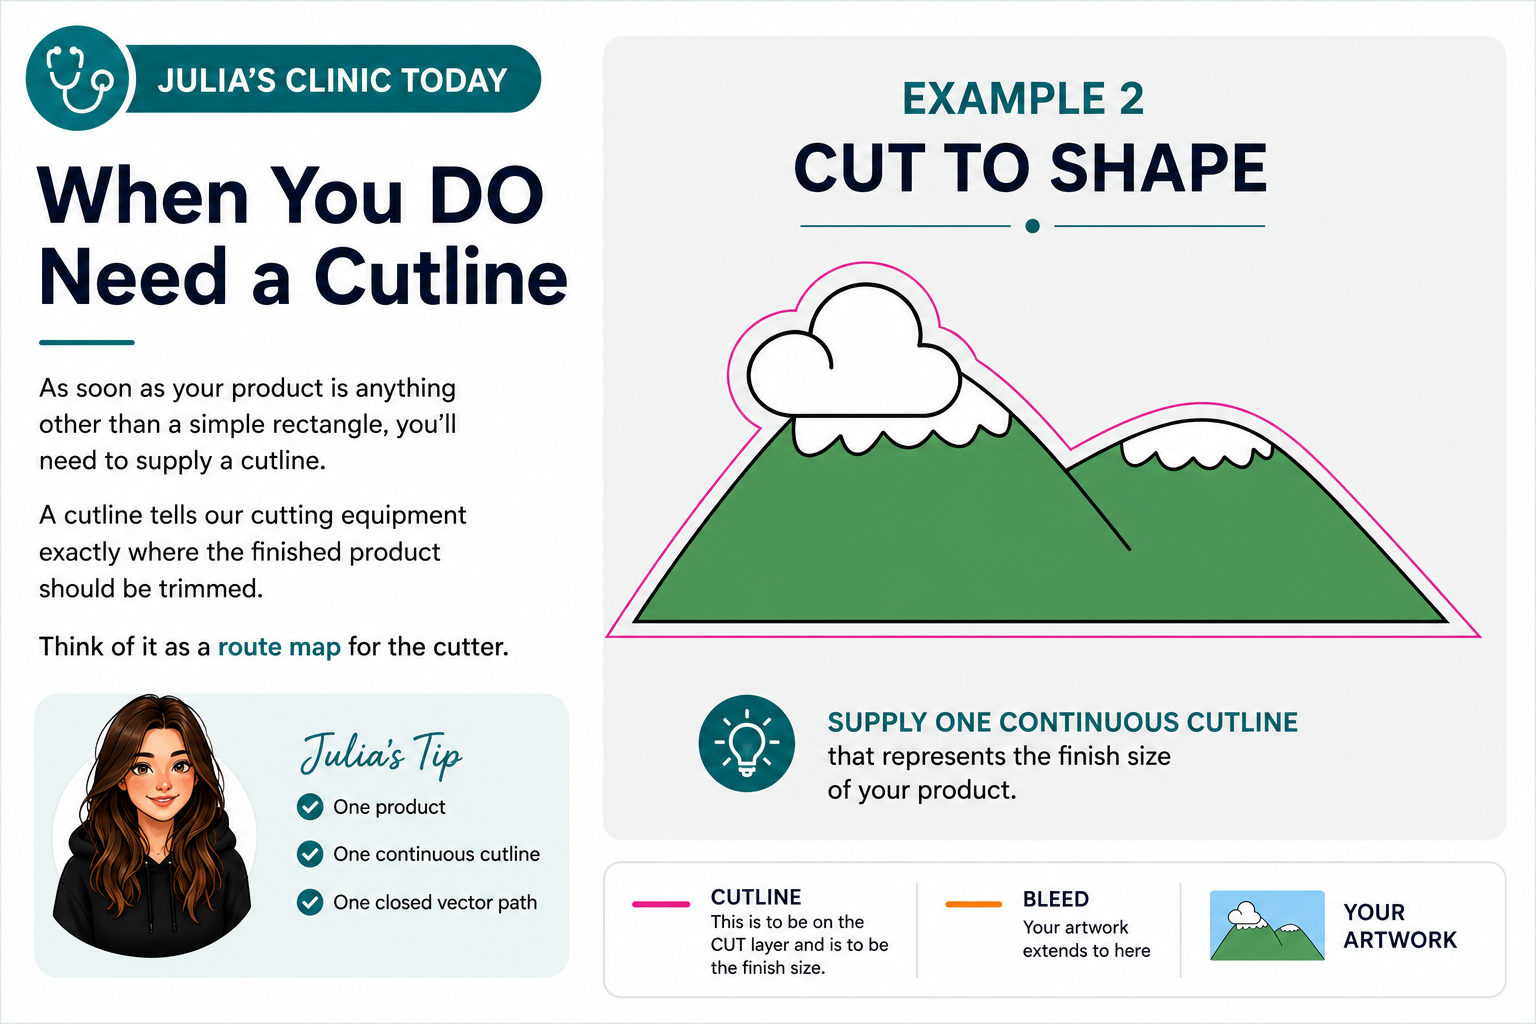
This cutline represents the finished size and shape of your printed product.
Internal Cut-Outs
Some designs require internal cut-outs, windows or holes.
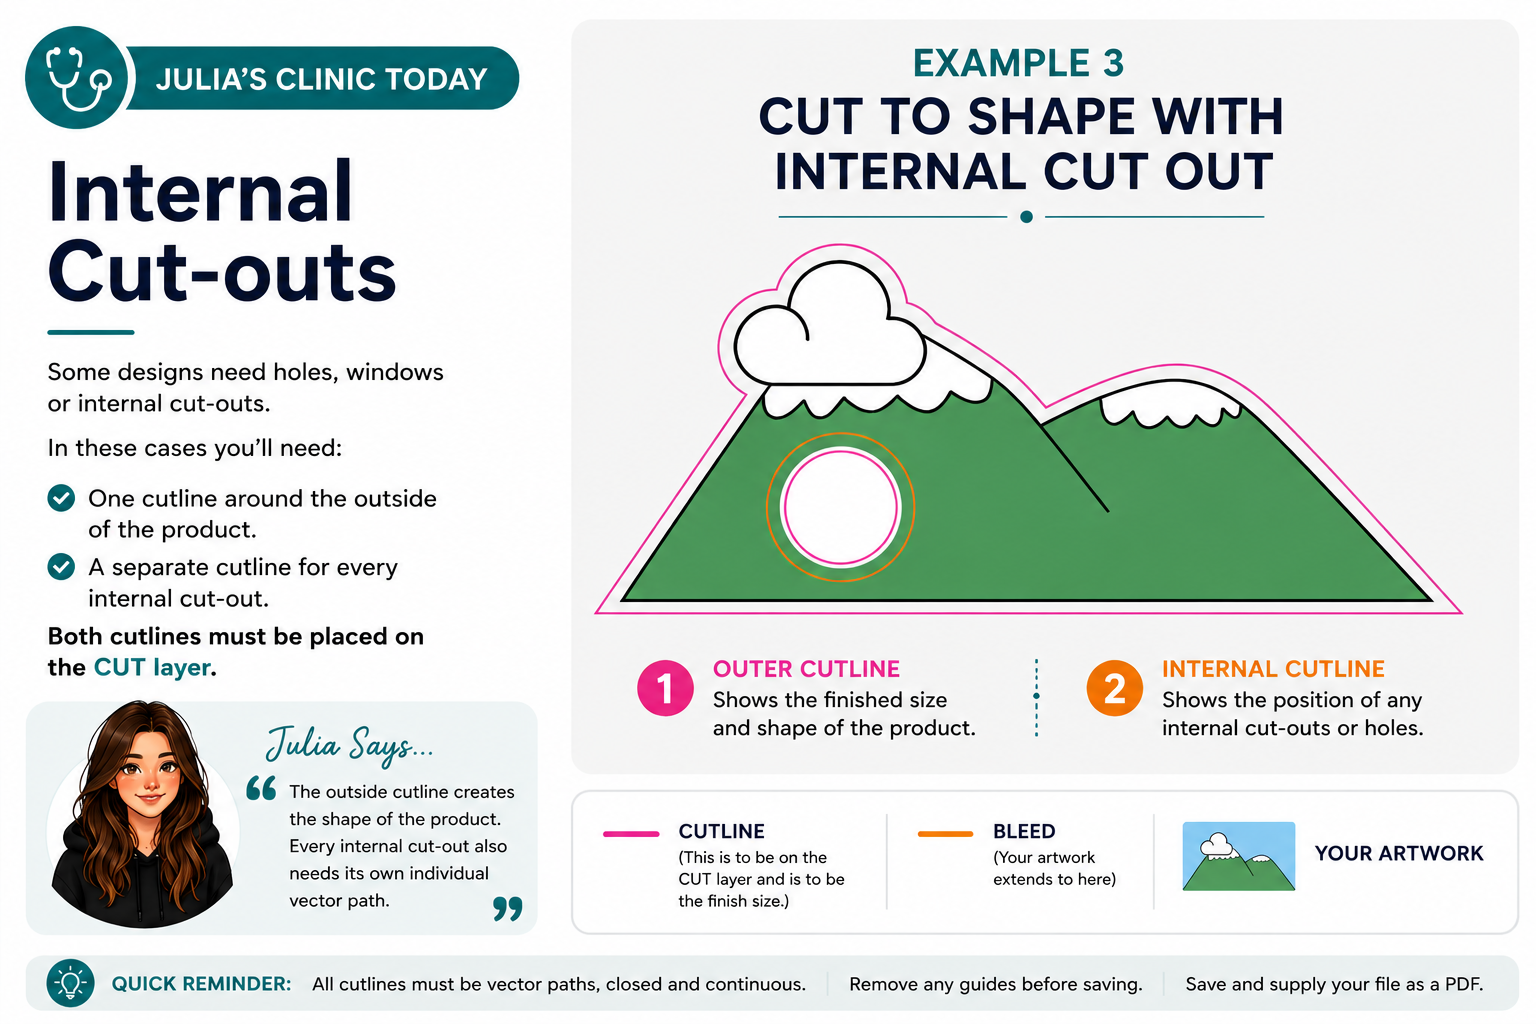
Supply an outer cutline for the finished shape and a separate cutline for each internal cut-out. Both should be placed on the CUT layer.
Adding Drill Holes
Drill holes should be created as vector circles on the CUT layer.
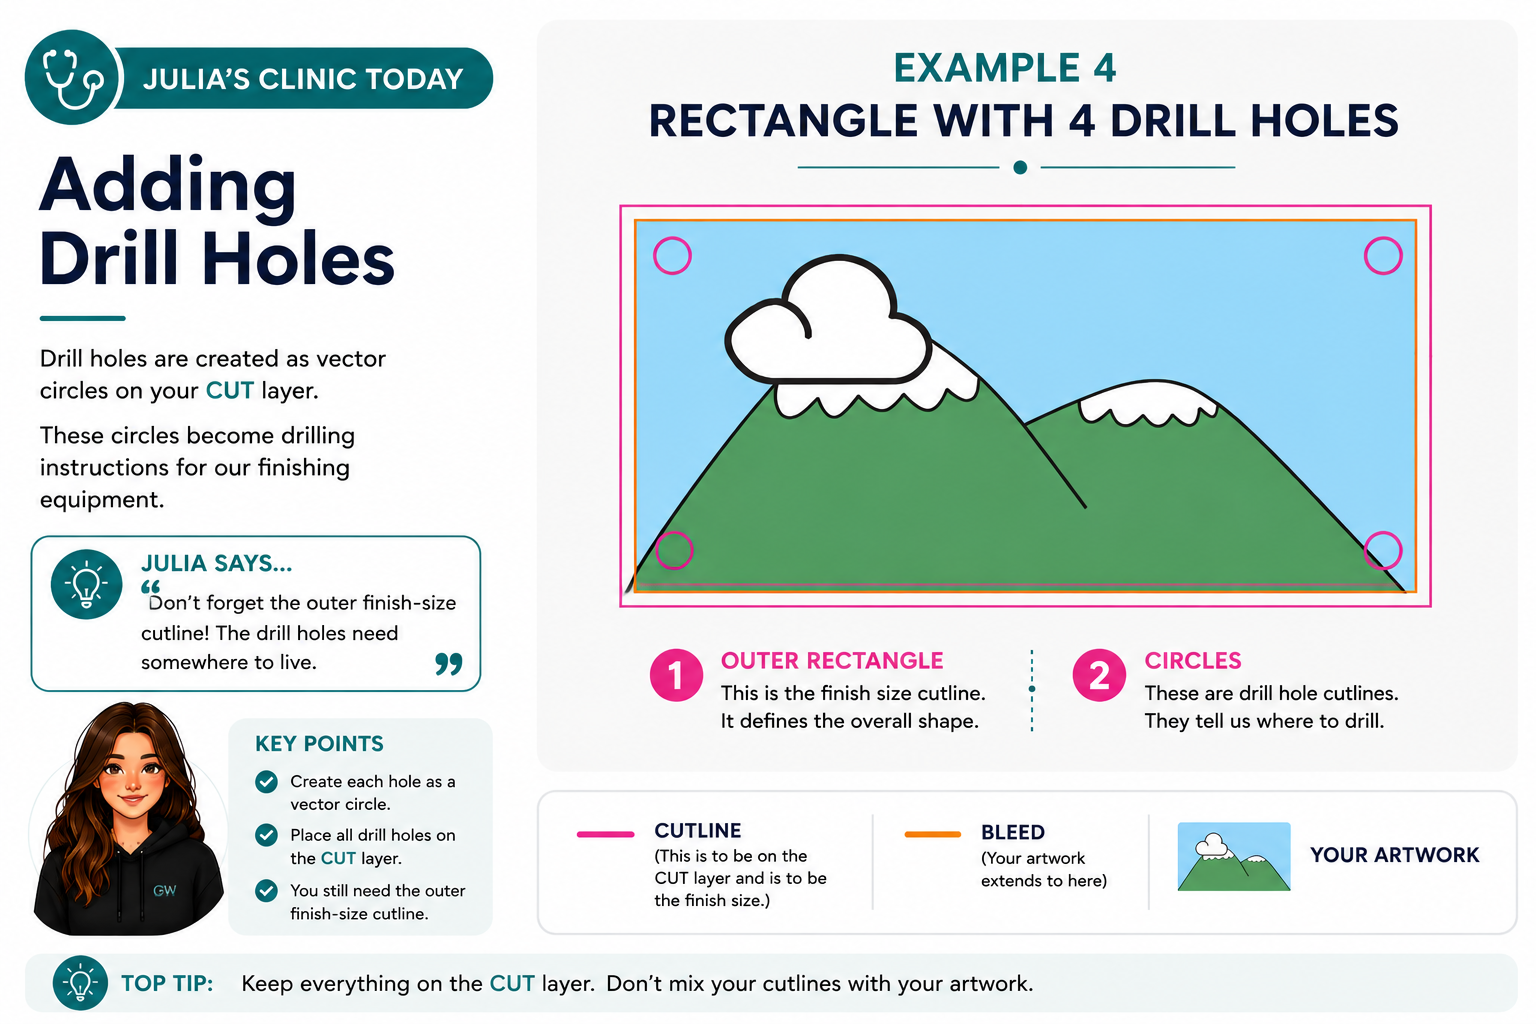
These circles tell our finishing equipment exactly where to drill. You still need to supply the outer finish-size cutline as well.
Combining Cutlines and Drill Holes
Some artwork needs everything together: an outer cutline, internal cut-outs and drill holes.
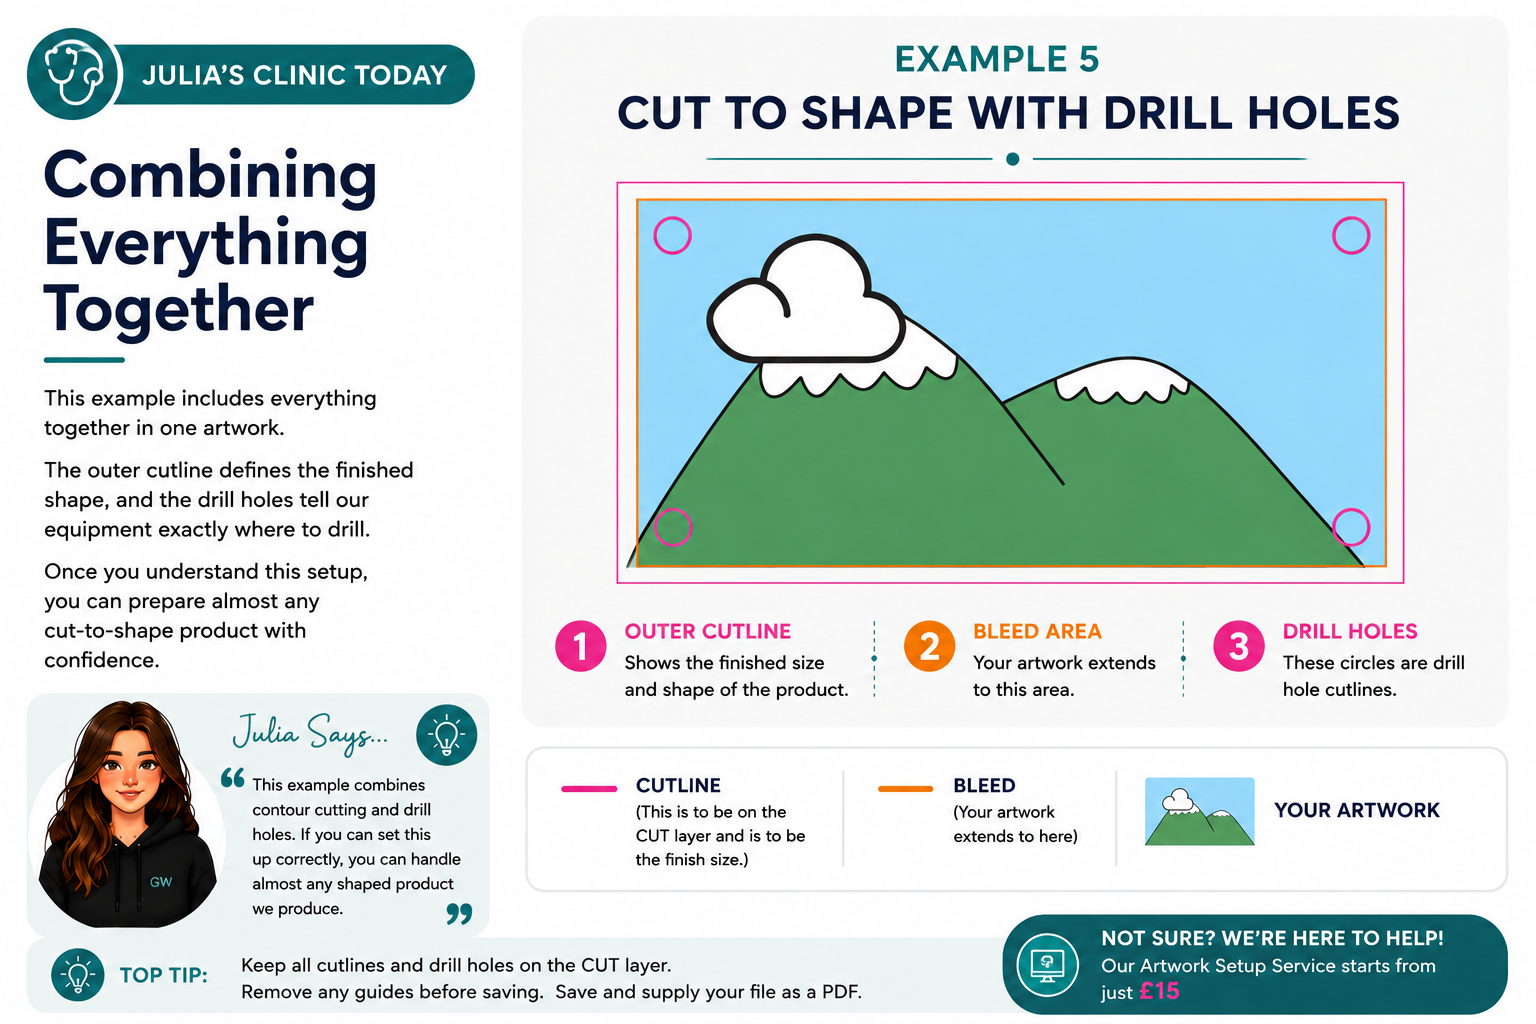
Once you understand this setup, you can prepare almost any cut-to-shape product with confidence.
The Cutline Key
Use this simple colour guide when checking your artwork:
- Pink: Cutline
- Orange: Bleed
- Blue/artwork area: Printed design
Julia’s Common Cutline Mistakes
These are the artwork issues we see most often when customers supply cutlines and drill holes. Avoiding them will help prevent production delays.
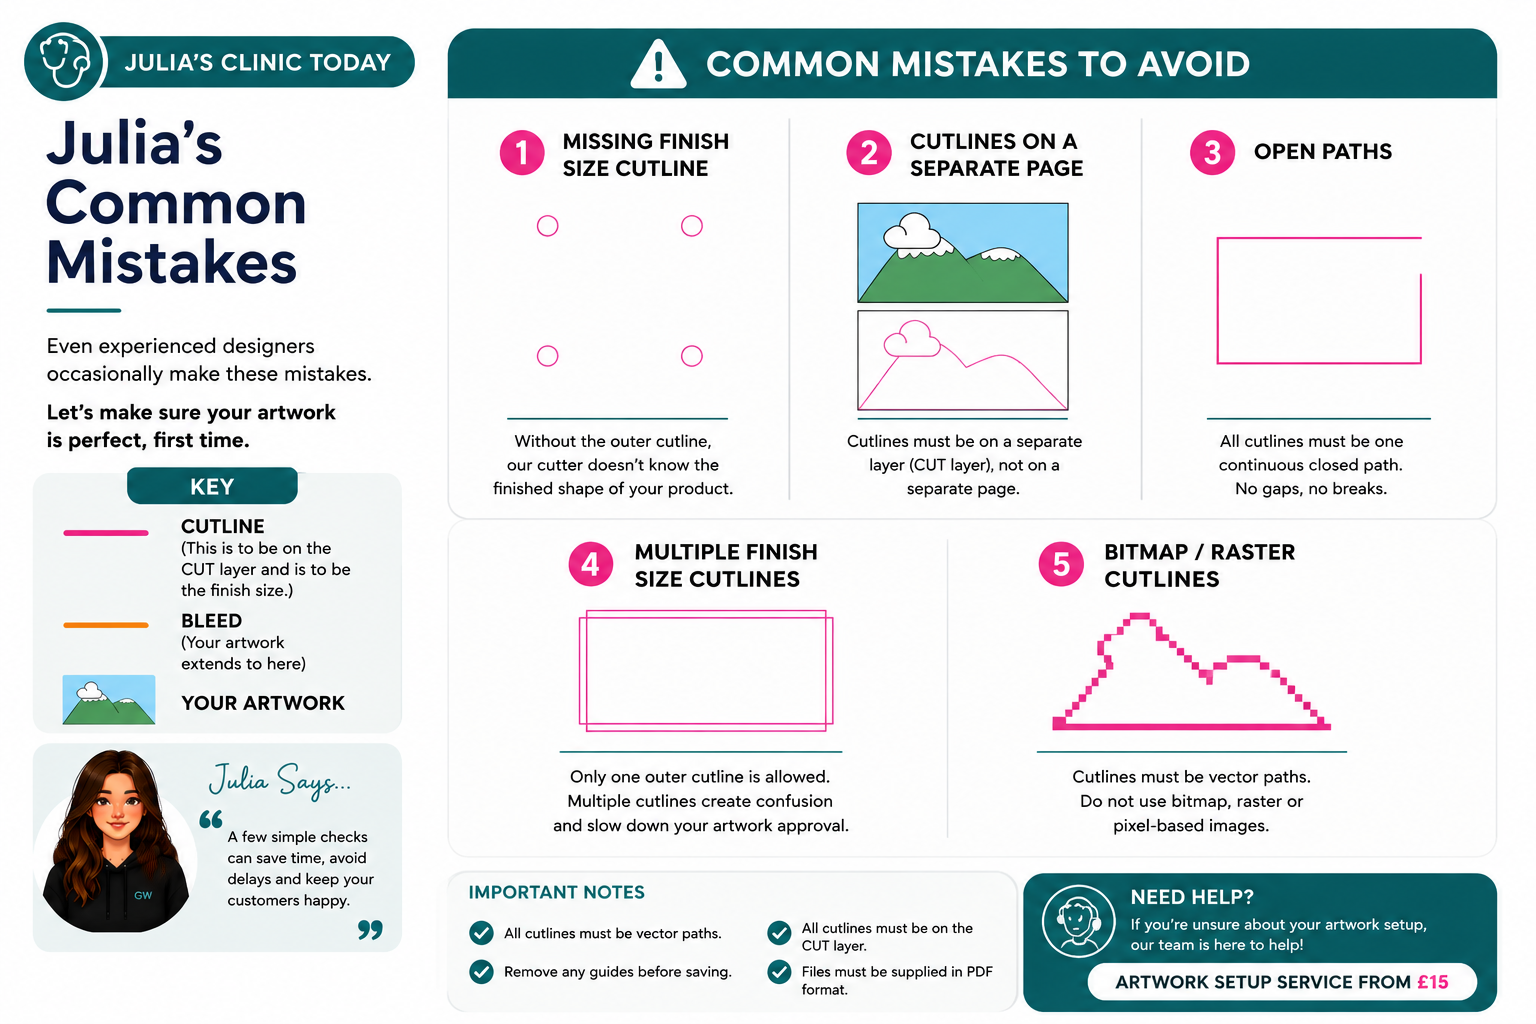
Missing Finish Size Cutline
Drill holes alone are not enough. We still need an outer cutline to define the finished size.
Cutlines on a Separate Page
Cutlines should be on a separate CUT layer, not on a second page within the PDF.
Open Paths
Cutlines must be closed vector paths. Gaps or broken paths can cause cutting issues.
Multiple Finish Cutlines
Only one outer finish-size cutline should be supplied.
Bitmap or Raster Cutlines
Cutlines must be vector paths. JPEG, PNG or pixel-based lines cannot be used for cutting.
Julia’s Final Artwork Checklist
- Artwork built at final size
- Correct bleed added
- Separate CUT layer created
- One continuous vector cutline supplied
- Drill holes added if required
- Guides removed before saving
- File supplied as a PDF
Julia’s Pro Tip
If you zoom in and your cutline looks pixelated, it isn’t a vector. Our cutters can only follow vector paths.
Need Help Setting Up Your Artwork?
If you’re unsure about your artwork setup, our team is here to help. Graphic Warehouse offers an artwork setup service from just £15, helping you avoid delays and get your files production-ready.
Ask Julia’s TeamNext Time in Julia’s Print Clinic
Why Do My Colours Look Different?
Julia explains RGB vs CMYK in plain English and shares practical tips to help you get better, more consistent colour results in print.
Please login to post a comment.