


This is probably the most frequent subject our customer service team are asked about, and rightly so, it can be confusing.
There are so many variations to consider, and the fitting of window graphics can be unforgiving. Hopefully, this simple guide will allow you to make informed decisions about materials, as we will discuss fitting in a later blog.
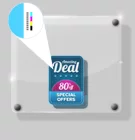
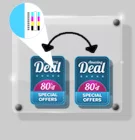
To try and keep this simple the two graphic types will be referred to as applied “inside a window” where the graphic is reverse applied to the glass. The second is applied “outside a window” where the graphic is face applied to the glass. Both cases are assumed to be viewed from outside.
Confusing as the title may seem, it’s important.
For example, most shop front window graphics will go on the inside of the window, this will protect the graphic from vandalism.
However, you should be aware of tinted windows as this will change the colour of your image when fitted inside the glass.
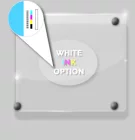
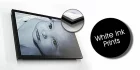
To manufacture a self adhesive sticker to go inside the glass the glue has to be “on top” of the image.
If the image is to be opaque with a “white point” then the image will have to have white ink or a block out of white vinyl applied to the reverse of the printed image.
To do this we will print the image in reverse onto a transparent vinyl and then apply a flood of white ink or white vinyl on top of the ink.
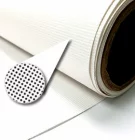
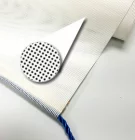
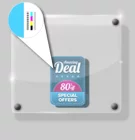
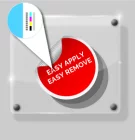
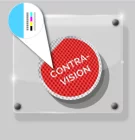
Vinyl is applied outside the glass.
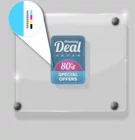
Vinyl is applied outside the glass.
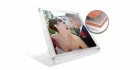
Vinyl is applied backed with white.
The image must be printed in reverse. Many mistakes are made here.
The artwork should always be supplied to us UNREVERSED. The printer will print and apply a white backing In either ink or white vinyl to your specifications (white ink costs more than white vinyl – ink, time, risk).
If you are applying to the outside of a window then this is simple. It is the same method as printing and protecting any “sticker” that might be damaged, it requires a laminate.
To do this we print on a self-adhesive vinyl. This is usually a monomeric vinyl that is suitable for flat surfaces. Monomeric vinyl may shrink a few millimetres over time.
Higher-performance vinyl may shrink less but be more cost-prohibitive.
Once printed a laminate (e.g. gloss, matt or anti-scuff) can then be applied to the face of the image, protecting the ink.
Supply the artwork with sufficient bleed, with your image flattened and converted to CMYK. Ensure your fonts are converted to paths.
Do not pre-tile your image. Our software will determine the best location to tile your image and will provide an overlap for fitting
Please login to post a comment.