


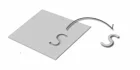


Cut to shape? Crease Lines? Drill Holes? No problem!
It’s all a matter of layers!
To add Cut, Crease or Drill Hole marks all you need to do is add the correctly named layer for your finishing process then add your finishing vectors to the new layer.
Your layers need to be called…
“CUT” for a through-cut or kiss-cut
“CREASE” for any crease lines
“DRILLHOLES” for any drill holes
You upload your files as per usual. When uploading your files our system will automatically extract the finishing information from your print file.
In the Proof and Approve stage you’ll be shown the extracted finishing information over-layed on your print file.
Still stuck? No worries. We’ve added videos for the 3 most popular design packages, just click to see a video of a cut to shape job being prepared & uploaded.
Please login to post a comment.