


How to... Install Floor Graphics
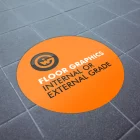
Ah Floor Graphics! 2020 has certainly been the year of floor graphics! We stock 3 flavours of Floor Graphics, R9 Anti-slip, R10 Anti-slip and an R11 Anti-slip. All three can be used internally and we can pair our R11 Anti-slip with an external grade vinyl so it can go outdoors!
We also supply an R12 which can supply as requested (it’s ridiculously expensive for a floor graphic so we don’t tend to stock it!)
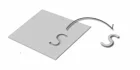
Fitting Floor Graphics...
What in the world is an R-Rating?
So an R-rating is basically a measure of how slippy a surface is at particular angles (It comes under DIN 51130 which is an internationally recognised measurement for floor anti-slip properties originating out of Germany)
It goes from R9 all the way up to R13. The chart below best shows the comparison but put simply R9 for low traffic indoor areas and R13 for high traffic external areas e.g. pavements, roads.
R13 is pretty much like sandpaper to the touch!
DIN 51130 | R9 | R10 | R11 | R12 | R13 |
Slip Angle | 6-10 deg | 10-19 deg | 19-27 deg | 27-35 deg | 35 deg |
Wet Slip Risk | High Risk | Moderate | Moderate | Low Risk | Low Risk |
Suitable for | Dry Areas | Areas kept mostly dry | Can be occasionally wet | Commercial Wet areas | Very wet commercial areas |
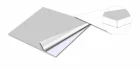
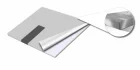
Single Piece vs Print & Laminate
So this is actually one of my pet peeves! We only stock two part (Print & Laminate) floor graphics. They last longer, they look better and are more abrasion resistent!
Single part floor graphics are great for short term usage but for anything over a few week's you'll see them start to fade and get scuffed. Stick to two part if you have the choice
The price point is so close between a single and two part we decided to just match the single part price rather than putting out an inferior product! It’s something to take note of, if you are ever shopping around for Floor Stickers!
Please login to post a comment.